
Overview
Trackers are a software concept or object that are central to the Scope 5 application. A tracker can be thought of a ledger or meter that tracks a certain activity at a certain location. So, for example, a user might configure one electricity tracker at each of several facilities. Each tracker would then track electricity use at the corresponding facility.
This article offers some notes on basic tracker setup and configuration.
Note that, before setting up any trackers, it is necessary to have at least one resource setup for the account. This is because trackers track resources (such as electricity). Therefore, without resources, there would be nothing to track. Review this article for details on setting up custom resources.
Navigation
Although trackers can be listed from any node in the hierarchy (in the Node Navigator context), they can only be created from a tracking node (one of the bottom-most or leaf nodes in the hierarchy). So - the first step is to navigate to a tracking node, in the Node Navigator context.
Then, click Tracker Pages in the sidenav. You will be taken to a page that looks something like this:

Note that the Cape Town tracking node has pre-existing trackers configured. If you have navigated to a node that has no trackers configured yet, the Tracker Pages sidenav will take you to a page that looks like this:

In either case, click on the + Add New Tracker link in order to create a new tracker. You will be taken to the new tracker configuration form. We'll look at the various sections of this form, one at a time.
Note that any fields in the tracker configuration form that are preceded with a red asterisk are required fields. All others are optional.
Basic
The Basic section of the tracker configuration form is used to name the tracker and to configure the tracker for either periodic or a-periodic record keeping. This section of the form looks like this:

Name (required)
We recommend naming your tracker in a manner that indicates both the location (such as the facility) at which the tracker is configured as well as the resource that it is tracking. So, examples of good tracker names include: Seattle Electricity or Nairobi Natural Gas.
Periodic Recordkeeping (optional)
Checking this box indicates that the tracker should expect activity data to be periodic. Trackers that track, for example, utility bills, fit into this category since utility bills are typically issued monthly or quarterly. When a tracker is configured for periodic recordkeeping, it will generate alerts warning of missing or extra activity records. For this reason, we recommend configuring most trackers for periodic recordkeeping.
Recording Interval (required if periodic recordkeeping is checked)
If periodic recordkeeping is checked, then a select box labeled recording interval will be present. (If periodic recordkeeping is not checked, then it will not be present). When the select box is present, it is necessary to select the appropriate recording interval. The most commonly selected intervals are Monthly (for utility bills or other data that users decide to track on a monthly basis) or Annually (for data that users collect once a year).
Resource Selection
Note on resources: On account setup, it is necessary to configure at least one (but typically several) resources to be available for the account. These may be copied from standard libraries or may be custom created. It is not uncommon for an account to have a few dozen resources configured and available for tracking. A detailed discussion of resource configuration is beyond the scope of this article.
This part of the form is used to select the specific resource (of the set of all resources configured for the account) that the tracker will be tracking. It features a series of select boxes that help the user progressively narrow the available choices until he or she finds the desired resource.
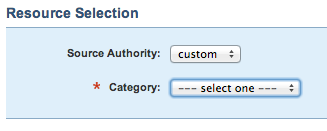
When first configuring a new tracker, the resource selection part of the form looks like this:
As the user makes selections, additional select boxes are revealed, resulting ultimately, in the selection of a single resource and an expanded form that looks like this:

In general, each selection narrows the resource choices available subsequently. Note that it may be necessary to wait for a few seconds for a selection to propagate through the system and present the next select box.
Source Authority
This selection specifies the original source of the resource that is being selected. In the second image above, the user has decided to use a resource from The GHG Protocol. In the first image, the user is looking for a custom configured resource. In many cases, only custom resources will be available for selection. Resources from authoritative sources will be available only if they are copied from one of the provided resource libraries and have not been customized by the user.
Category, Type & Sub Type
These help to further filter the available resources and generally result in a small list of resources being presented as options in the next select box.
Resource (required)
This is where the specific resource to be tracked is selected.
Recording Units (required)
Once a resource has been selected, this field is used to select the units in which activity will be recorded. For example, if the resource is motor gasoline then trackers in the US may be configured to track in gallons whereas trackers in Europe may be configured to track in liters. Note that only a certain type of units will be available, depending on the configuration of the selected resource. For example, if a waste resource is selected and the resource is configured to interpret activity in units of type volume then trackers tracking this resource will have various options for recording units including gallons, barrels etc. but will not have weight options.
GHG Scope (optional)
This select box is used to select the scope of greenhouse gases under which the trackers activity will be reported. If none is selected, the tracker will be assumed not to contribute to greenhouse emissions.
Advanced
This area of the form is used to configure certain advanced (or less often used) attributes of a tracker.
Brought Online, Retired (optional)
For the purpose of this discussion, note that all accounts are configured for a base year end date (see Preferences & Settings under the Organization tab to find your organization's base year end date). The application generally expects activity data to be recorded starting one year prior to the base year end date and present through today's date. If it is not, the application will alert the user regarding missing data.
The Brought Online and Retired fields allow the user to specify alternate start and/or end dates for a specific tracker. In this case the application will not expect activity data prior to the Brought Online date or after the Retired date. The Brought Online date should be the first day the tracker is active and the Retired date should be the last day the tracker is active.
Consider for example an organization that has a base year of 2009. In January of 2011, a new furnace was acquired. When configuring a tracker for the new furnace, the user should enter 1/1/2011 as the Brought Online date. Failure to do so will result in alerts for the new tracker regarding data missing between 1/1/2009 and 1/1/2011. If that furnace was no longer used after 2015, the user should enter 12/31/2015 as the Retired date.
Instantaneous
When a tracker is set to accruing or ongoing, any activity data recorded on a tracker is assumed to have been incurred uniformly over a period between the date of the corresponding activity record and the date of the previous (or next, in the case of ongoing) activity record.
For example, if an accruing tracker has an activity record of 3,692 kWh dated 2/15/19 and the previous activity record is dated 1/17/19, then those 3,692 kWh are assumed to have been incurred uniformly over the 29 days between 1/17/19 and 2/15/19 (for a daily rate of 127.3 kWh per day).
For most types of activity, this assumption is reasonable. However, there may be certain cases in which activity is instantaneous. One example is when excess flammable gases are flared or burnt off in a few seconds. In this case, the activity may truly be considered to have occurred instantaneously.
Checking the Instantaneous checkbox will apply all of the activity to the activity record's date, instead of applying it uniformly across the period since the prior record. Changing a tracker to instantaneous will impact the way charts and reports distribute and apply tracker activity over time. The more infrequent the tracker's activity, the more impact that distribution will have.
Extrapolation
Scope 5 uses extrapolation to estimate activity for time periods for which none has been entered by the user. This applies both to past missing data as well as to future (as yet unknown) data. A detailed discussion of extrapolation is beyond the scope of this article. We generally recommend enabling seasonal extrapolation. The extrapolation setting can be changed at any time and will take effect within 24 hours. Note that per-tracker configuration settings for extrapolation may be overridden by account wide settings (in this case, a message will appear in the tracker form warning the user to this effect).
Cost Tracking
See the related article in this forum titled Cost Tracking.
Categorization
Tags (optional)
Tags are the primary mechanism recommended for categorizing trackers. In order to configure tags on a tracker, there must be tags defined for the account. In the sample form illustrated above, there are tags defined for the account. If no tags are defined, none will be available in the tracker form. Tag definition and use are beyond the scope of this article.
Outlier Detection
Outlier detection may be enabled in order to be alerted to the possibility of erroneous activity data. See the related article in this forum titled Outlier Detection.
Annotation
This part of the form can be used to record notes regarding the tracker and its configuration. Any notes recorded are maintained in the form for future reference. They are not used anywhere else in the application.
Comments