Dashboard
Data Providers will receive an email with a link to the Scope 5 application, their login, and password.
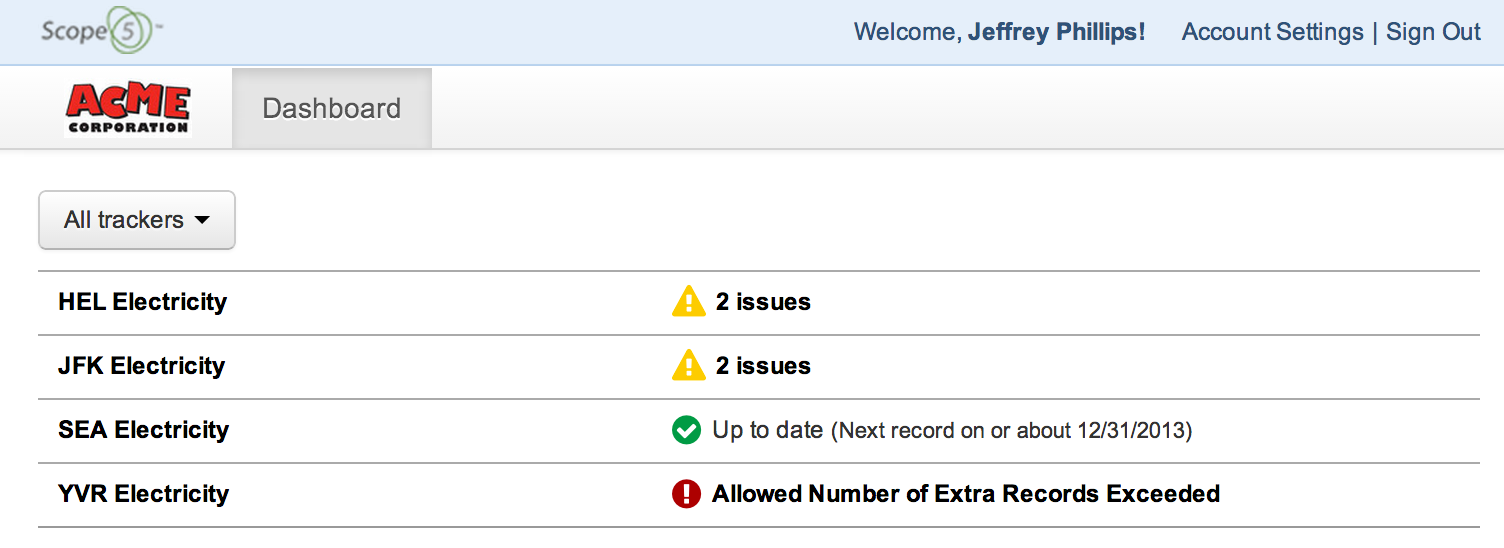
Upon logging in, data providers will be presented with a dashboard containing a list of trackers with their status. A colored icon and status message will indicate If a tracker needs attention.
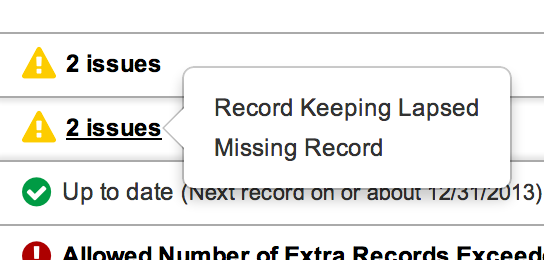
For trackers with multiple exceptions, you can hover over the status to quickly see what the issues are.
In addition to getting the status for all the user's trackers on one page, the dashboard view allows you to quickly enter activity records. Click anywhere on the row to expand the activity record quick entry form.
Note: clicking on the name of the tracker, or on a tracker row with a red exception icon will take you to that tracker's page.
Adding Records
After clicking on a tracker row, you'll get a form where you can enter activity records for a tracker. The last record's details are visible as well as some additional information about the tracker warnings (if applicable).
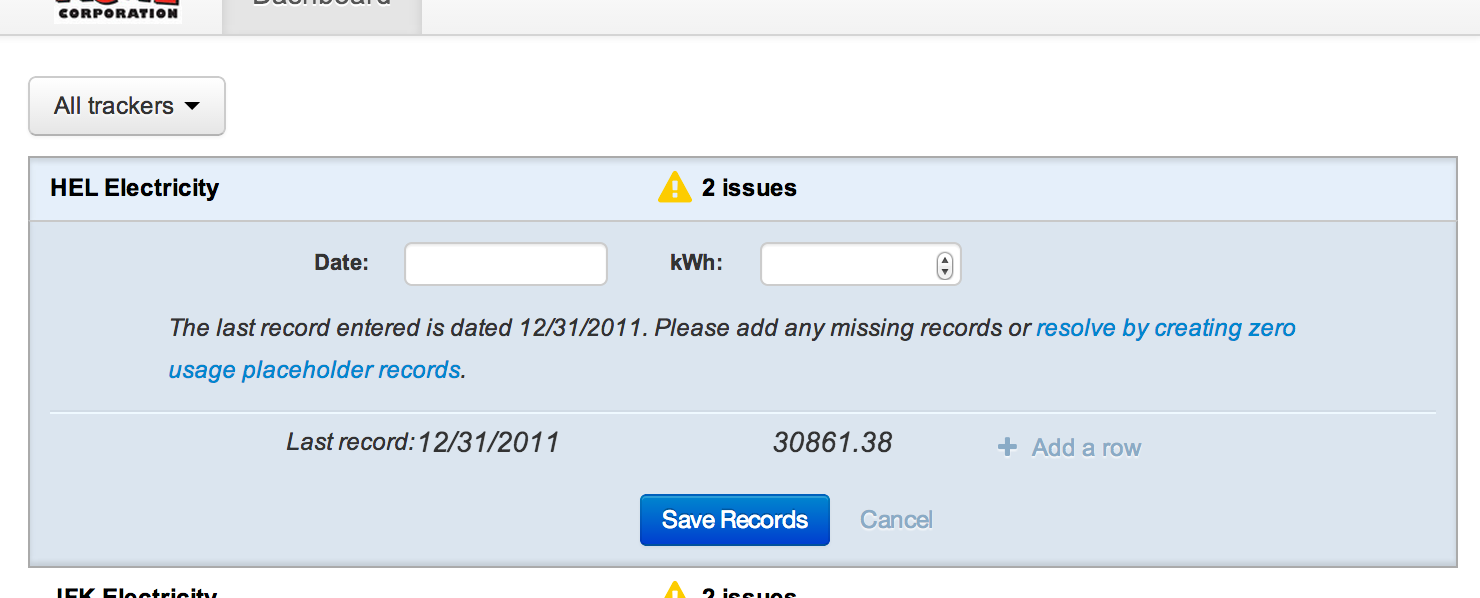
Click + Add a row to add more records, Cancel to clear the form and hide it. If you would like to view the full activity ledger for the tracker, click on the tracker name to be taken to the tracker page with all of the tracker's details and full activity history (the tracker page is where you are able to edit and delete activity records).
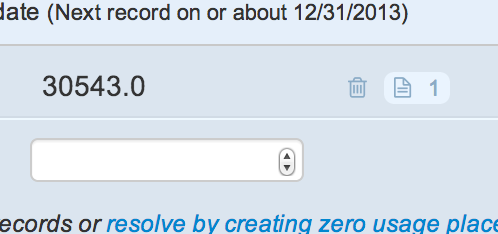
Upon saving, your new records will be visible above the quick entry form, along with a link to delete (trash can icon) and add annotations (document icon) to the newly created records.

Annotations
You can add annotations and upload supporting documentation to a record after you've created the records. Click the document icon on the right of the new record row to open the documentation dialog. You can enter a note or upload a file (or both). Click Attach when done.
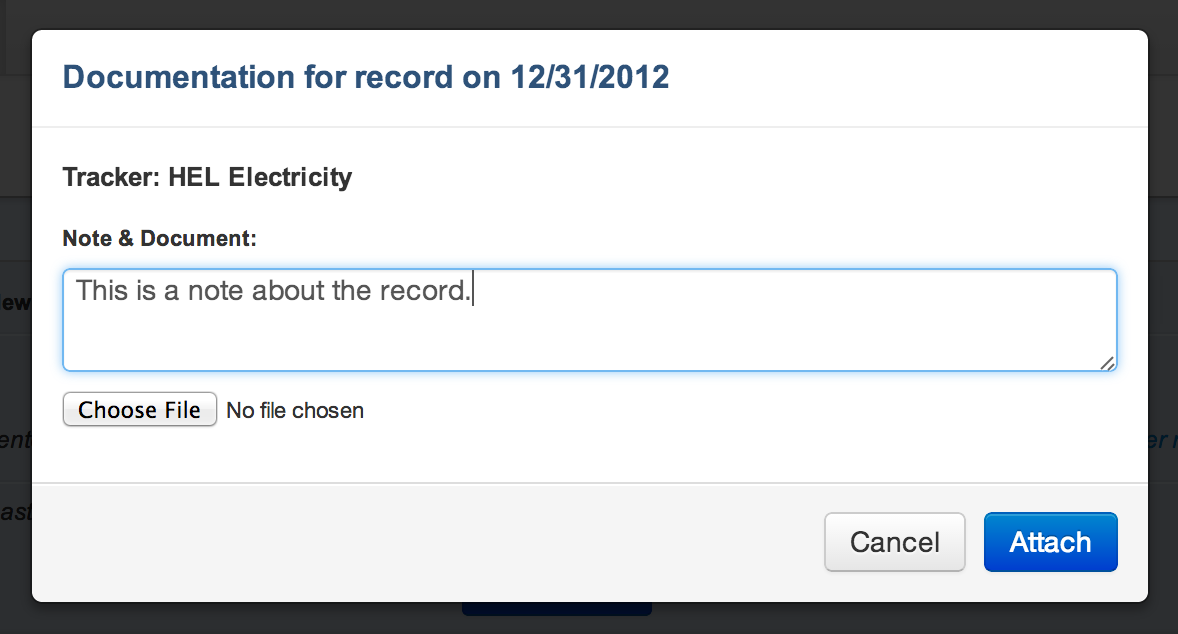
If you attached a note, you will return to the dashboard and see the note count for that activity record updated. You can continue to add notes to the new records (unless you attach a file, which will require a page refresh).
Filtering Trackers
You can use the filter to display a subset of trackers.
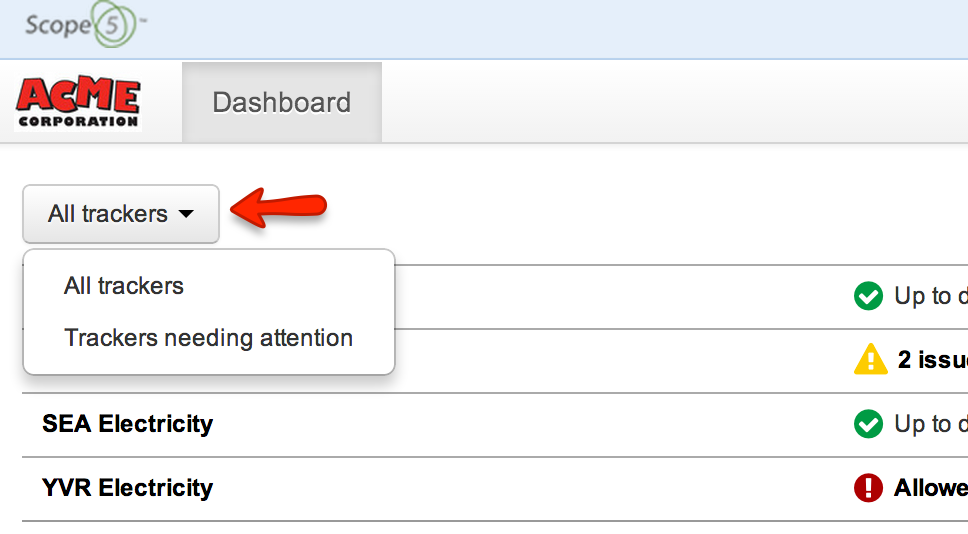
If you have a significant number of trackers in your dashboard, you'll be presented with additional filter options. By default, you'll see All tracker and Trackers needing attention.
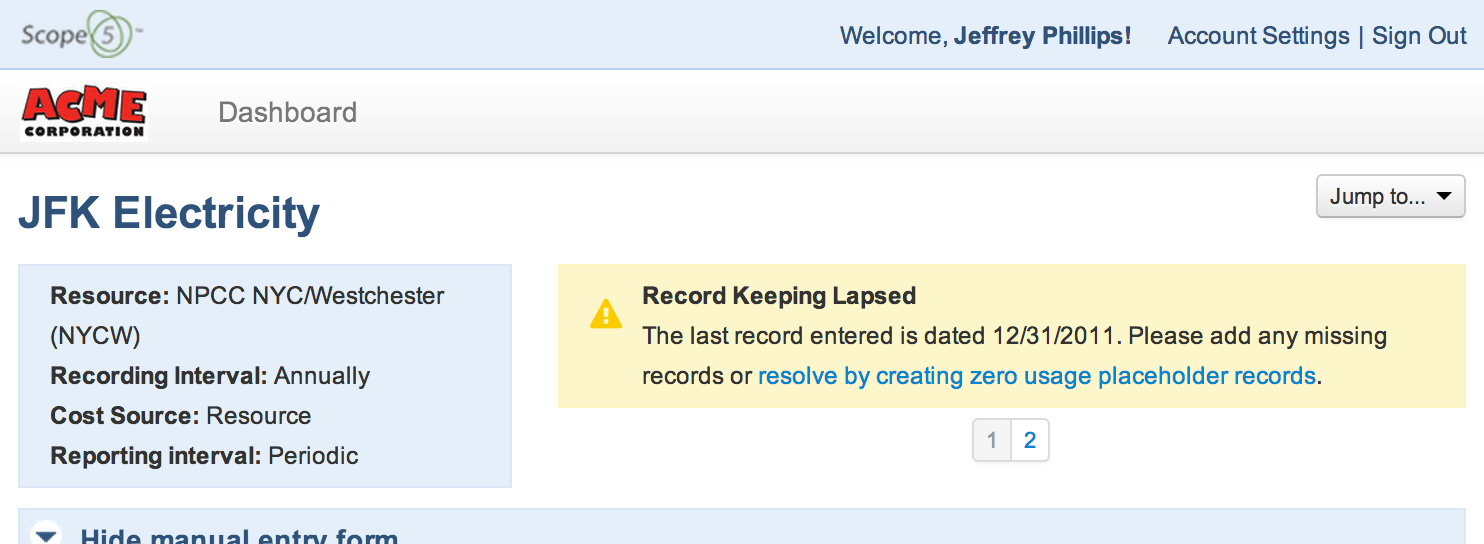
Tracker Page
The individual tracker pages contain the same form for entering activity records for the tracker. In addition to the form, you can see more details about any exceptions, the full activity record ledger, and any charts associated with the tracker.
Alerts
Underneath the alerts box, you can browse through the different alerts if multiple alerts exist.
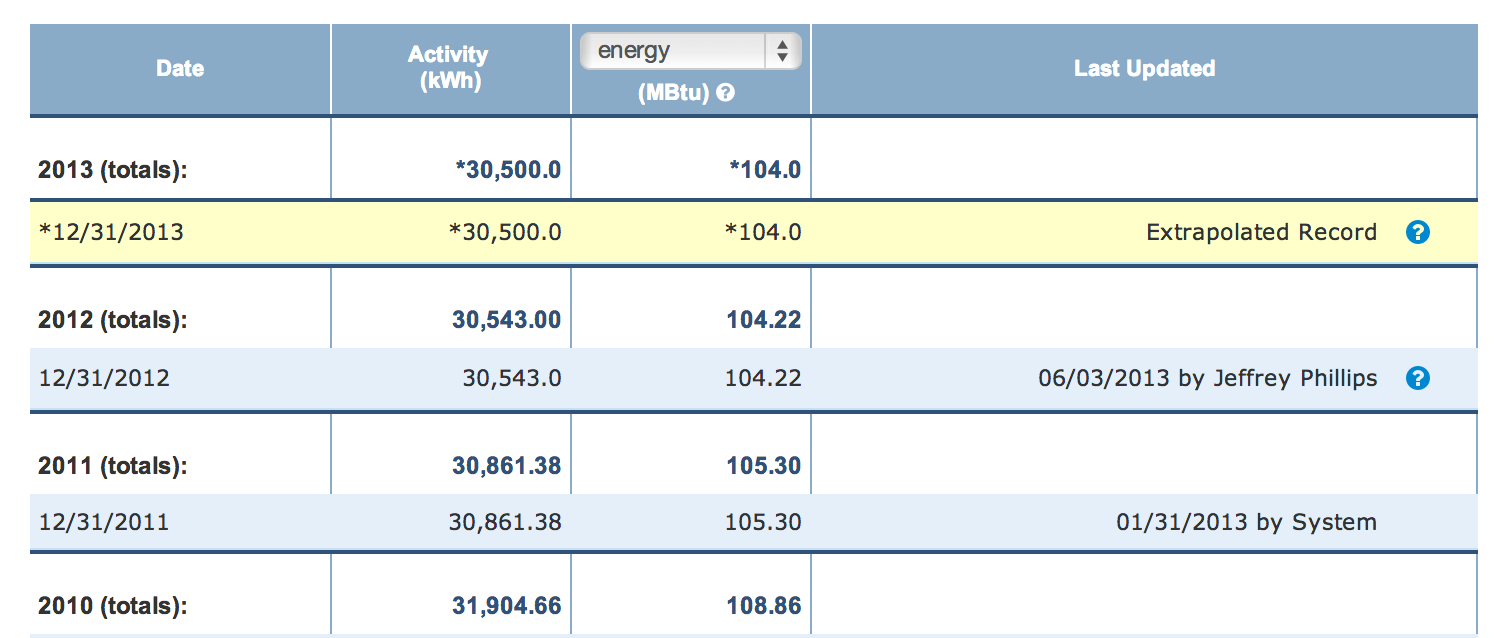
Editing Records
Click on any row in the ledger to edit that record. The edit page contains the link to add notes and documents to a record.
You'll find a button to delete activity records on the edit page.
Note: You cannot edit or delete extrapolated records (one of the type of yellow rows in the ledger). Extrapolated records will go away once real activity records are added at the correct intervals.
Charts
Below the ledger, you'll find charts that correspond to the tracker.
Account Settings
Click the Account Settings link in the header to edit some details about your user.

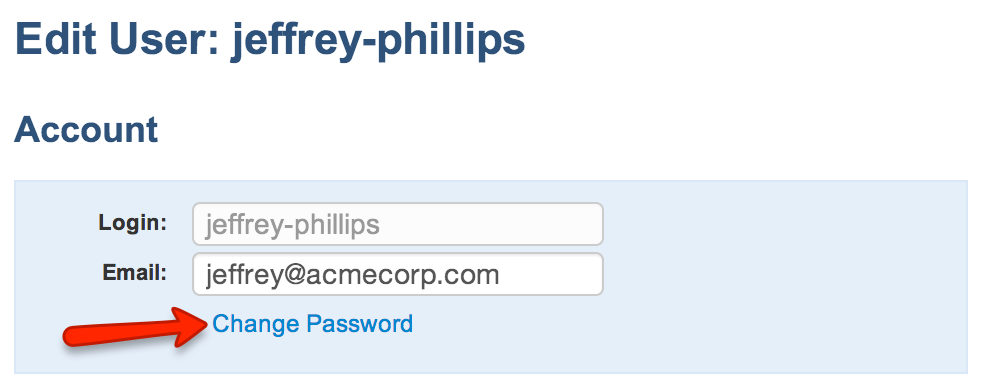
Change Password
You'll find a link to change your password on the Account Settings page.
Browser Requirements
The data provider experience takes advantage of features only available to modern browsers. Therefore, Internet Explorer 7 is not supported.
Supported Browsers
Recommended: IE9+, Firefox, Chrome, or Safari
Supported: IE 8, Mobile Safari (iPad)
Comments